Cindermedusae - making generative creatures

Background
Cindermedusae is quite a special project for me. It was super fast (about one week) and quite intensive (several late nights) yet very successful and rewarding when it comes to results. I liked the idea of generative book from the very beginning so I was very excited about Written Images competition when I heard about it for the first time. At this moment I was still working at shiftcontrol on underwater game project for ZDF called Universum Der Oceane in collaboration with Hosoya Schaefer Architects. More info about that project is here. We had many meetings and discussions about gameplay, creature behaviors and procedural animation so this is probably where I got interested in giantjellyfish. They are astonishingly interesting creatures - I like they way the move, so slowly. Perfect choice for a little bit of coded mesh bending.
Procedural geometry
It's not the first time I was doing procedural geometry. Actually it's what all the demoscene is about. One example could be cactus-like torus in our intro called Borntro. Although original Cindermedusae code is in C++/Cinder I'll describe some basic ideas behind jellyfish geometry generation with accompanying code examples in ProcessingJS. Most of them will be in 2d and interactive so it's easier to get the idea (and draw it!). In few cases when I use 3d you will need WebGL capable browser to view them properly.
Head
Let's start with a circle (or sphere in 3d) and view from the top. It's a collection of points that distance r is constant from a given point called circle's center. If that point is (0, 0) then any point on the circle can be described as a function of angle phi from 0 to 2*PI:
x = r * cos(phi)
y = r * sin(phi)
In the next step we dynamically adjust the radius with a sine wave so it will change from 0.925 to 1.075 (92.5% - 107.5% of it's length). We multiply phi by 10 so we will have our wave going up and down ten times.
x = r * (1 + 0.075 * cos(phi * 10)) * cos(phi)
y = r * (1 + 0.075 * cos(phi * 10)) * sin(phi)
The red lines in the last step are segments we selected as start point for tentacles. We will use them in the future.
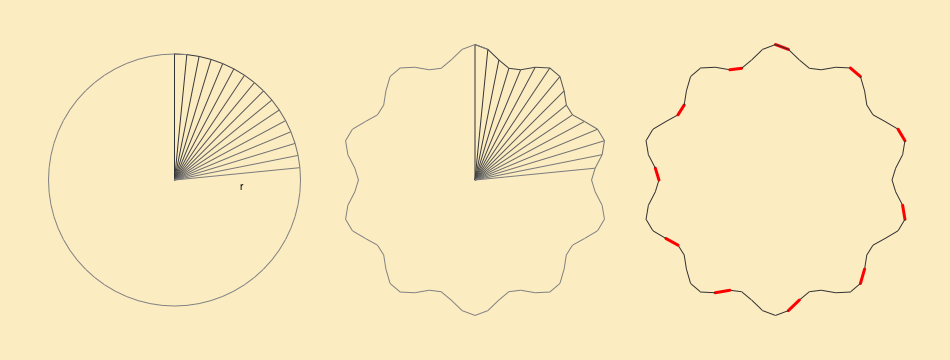
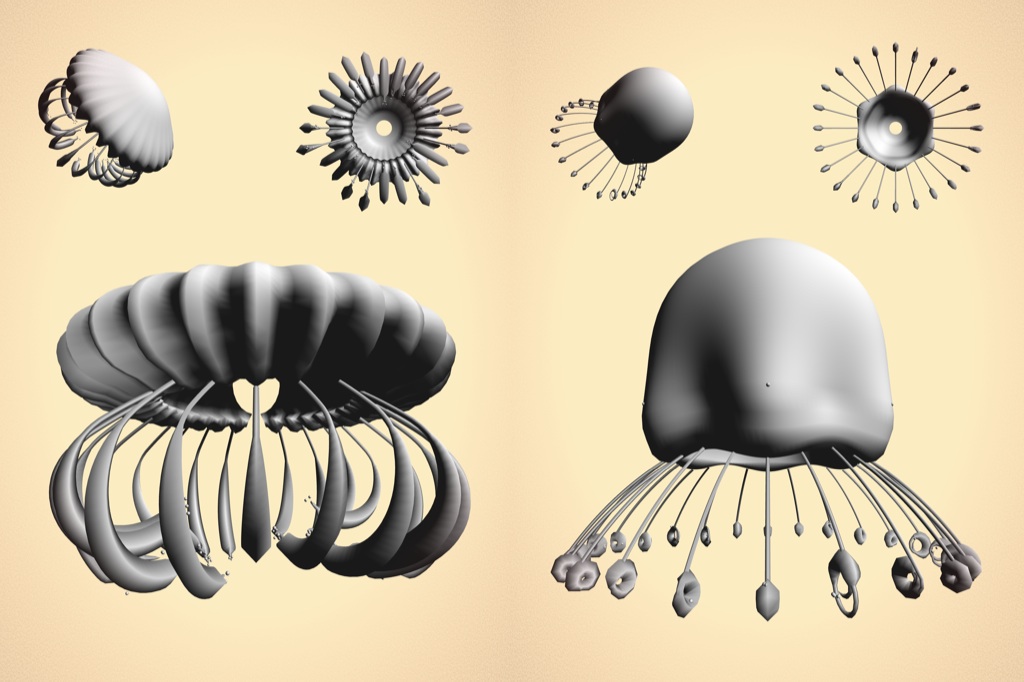
Head viewed from the top. Click the image to view example sketch and source code.
If we look at the head of our jellyfish for a side it's also a circle. In the end we are playing with spheres in 3d, don't we? The difference is that this time the angle theta changes from 0 at the top to PI at the bottom. The head is symmetrical along Y axis so we will construct two points in every step - one on the left and one on the right side.
x = r * cos(theta)
y = r * sin(theta)
x' = -x
y' =  y
Because jellyfish head is more like a dome than a sphere we want to make a shape that is convex on the top and concave on the bottom. All we have to do is to flip y coordinate after we reach certain angle (PI/2 or 90' in this case). We also add r/2 to push it a little bit down (otherwise both halves of the circle would overlap).
if (theta < PI/2) {
    x = r * cos(theta)
    y = r * sin(theta)
}
else {
    x = r * cos(theta)
    y = -r * sin(theta) + r * 0.5
}
In the last step we smooth the edge around point when we wrap the circle for nicer look and to avoid shading artifacts. I won't describe it here because it's yet another if and sin() so please refer to the source code for details.
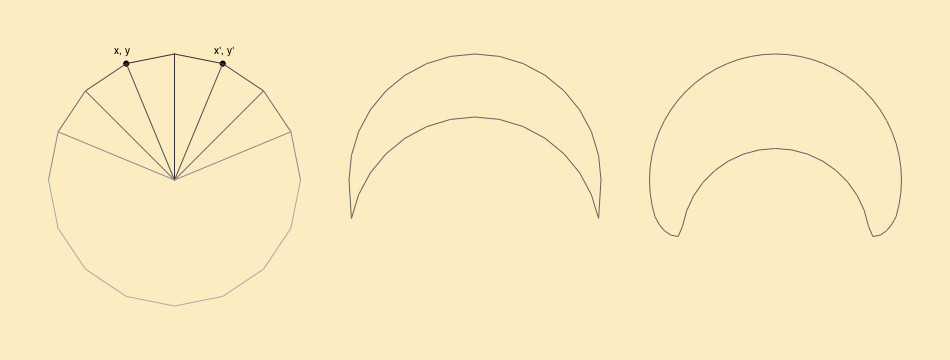
Head viewed from a side. Click the image to view example sketch and source code.
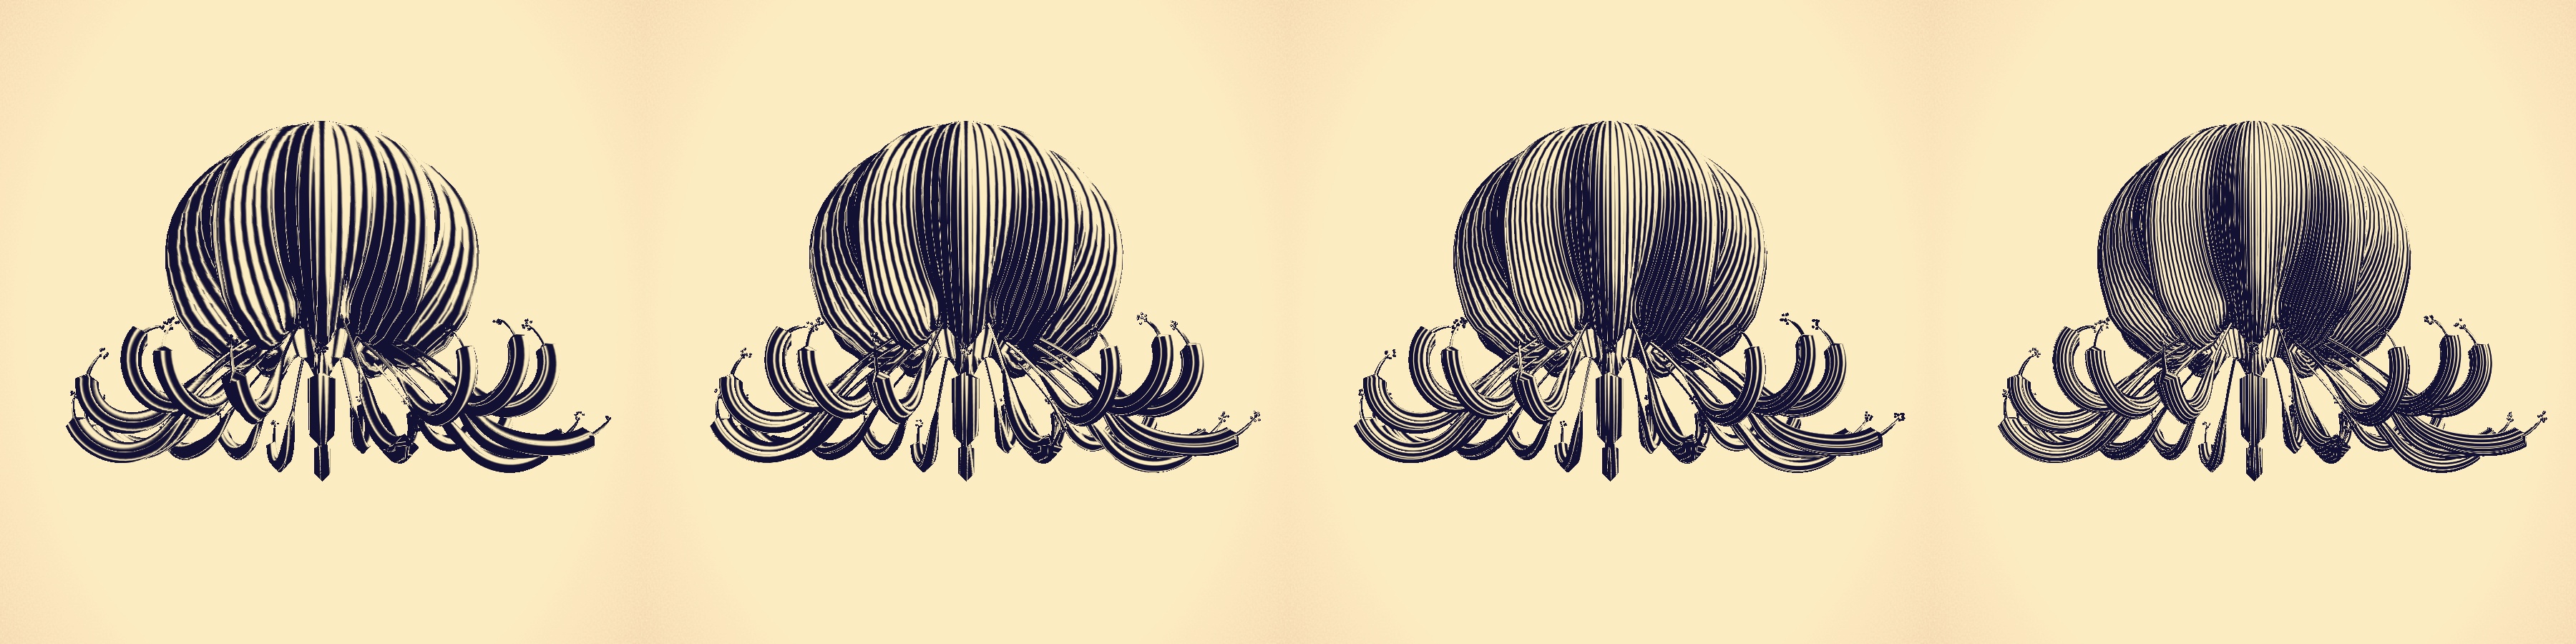
There are better ways to animate our jelly but because Written Images wasn't an animation competition I used the simplest one - sin(). Nobody will see the difference on a static image anyway. Every frame after calculating points positions x,y I also calculate surface normals. Next if the animation is turned on I move the point along the normal according to the value of sin() function at given moment in time t. This moves our points in and out but if we stopped here our head would just pulsate, growing bigger and smaller - all points at the same time. That's why I add y*0.5 to t so I introduce phase shift along Y axis and the mesh starts wobbling.
x += normal.x * sin(t + y * 0.5)
y += normal.y * sin(t + y * 0.5)
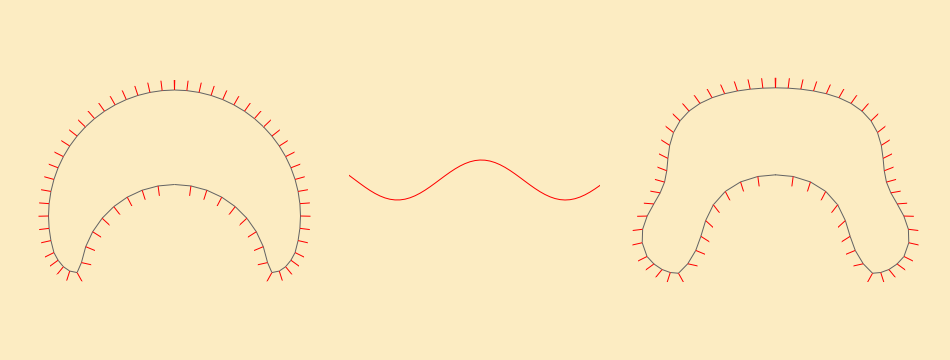
Head viewed from a side - animated. Click the image to view example sketch and source code.
As an excercise I decided to try to combine all above steps and code it in 3d using JavaScript and ProcessingJS. I was surprised that it's almost copy&paste of my C++ code. I tried to keep the code as simple as possible so it's not the most optimized version, performance suffers a lot.
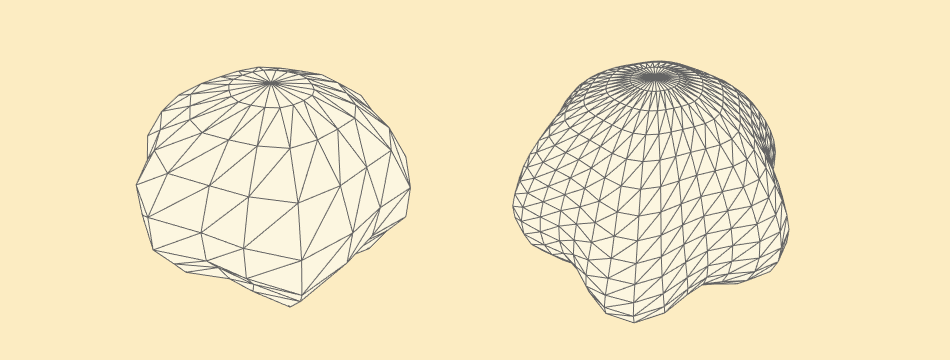
Head in 3d. Click the image to view example 3D sketch and source code.
Tentacles
Problem:
Given a curve (or rather polyline) build a tube-like mesh around it.
Solution:
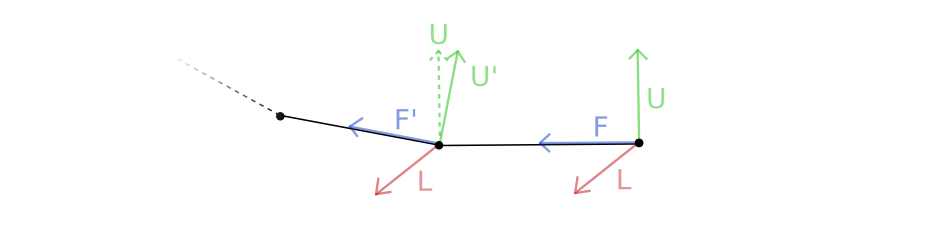
We start with three perpendicular vectors: Forward (usually the normal in point when I want to attach the tentacle or if we have curve formula it would be the tangent vector), Up (arbitrarily chosen by me (0,1,0)) and Left that can be calculated using Right-hand rule as:
L = U x F
Where x is the cross product of two three dimensional vectors. Now if for the second point we have new F' vector but the same L vector we can calculate the new U' as
U = F x L
Then we repeat this steps for each point / segment of the line to calculate new coordinate base from Up, Front and Left.
 All this is basically borrowing ideas from
[Frenet–Serret frame](http://en.wikipedia.org/wiki/Frenet%E2%80%93Serret_formulas) without playing with calculus to much. If you are coding in Cinder don't event bother implementing it by yourself. [Chaoticbob](http://forum.libcinder.org/#User/chaoticbob) already did that for you and implemented even better [Parallel Transport Frames](http://forum.libcinder.org/#topic/23286000000494005).
All this is basically borrowing ideas from
[Frenet–Serret frame](http://en.wikipedia.org/wiki/Frenet%E2%80%93Serret_formulas) without playing with calculus to much. If you are coding in Cinder don't event bother implementing it by yourself. [Chaoticbob](http://forum.libcinder.org/#User/chaoticbob) already did that for you and implemented even better [Parallel Transport Frames](http://forum.libcinder.org/#topic/23286000000494005).
When we have all the Up and Forward vectors it's easy to start building triangles. In the following example I added to more things. First, the Up vector gets smaller and smaller towards the tip of the tentacle. Second, based on the mouse position I bend the tentacle. It bends more the closer to the end. This bending force is visualized by red lines.
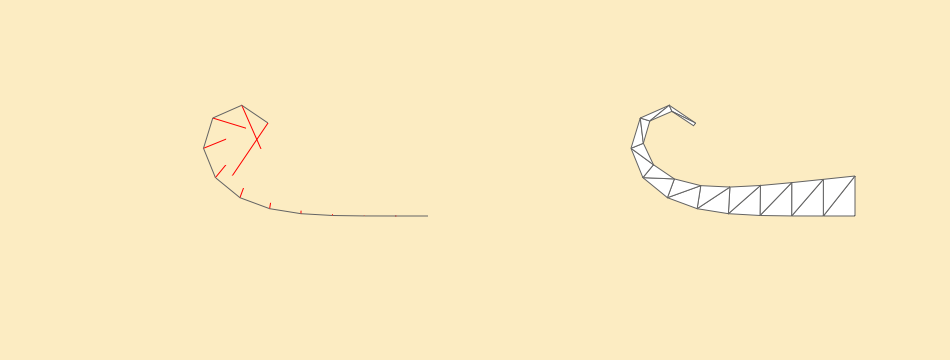
Tentacle mesh. Click the image to view example sketch and source code.
Now we are ready to attach the tentacles to the head. I'm merging geometry at all because shading will hide any discontinuities on the surface.
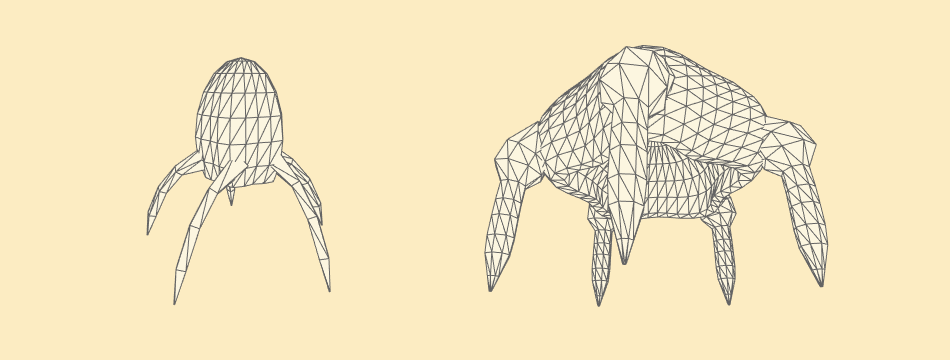
Head with tentacles in 3d. Click the image to view example 3D sketch and source code.
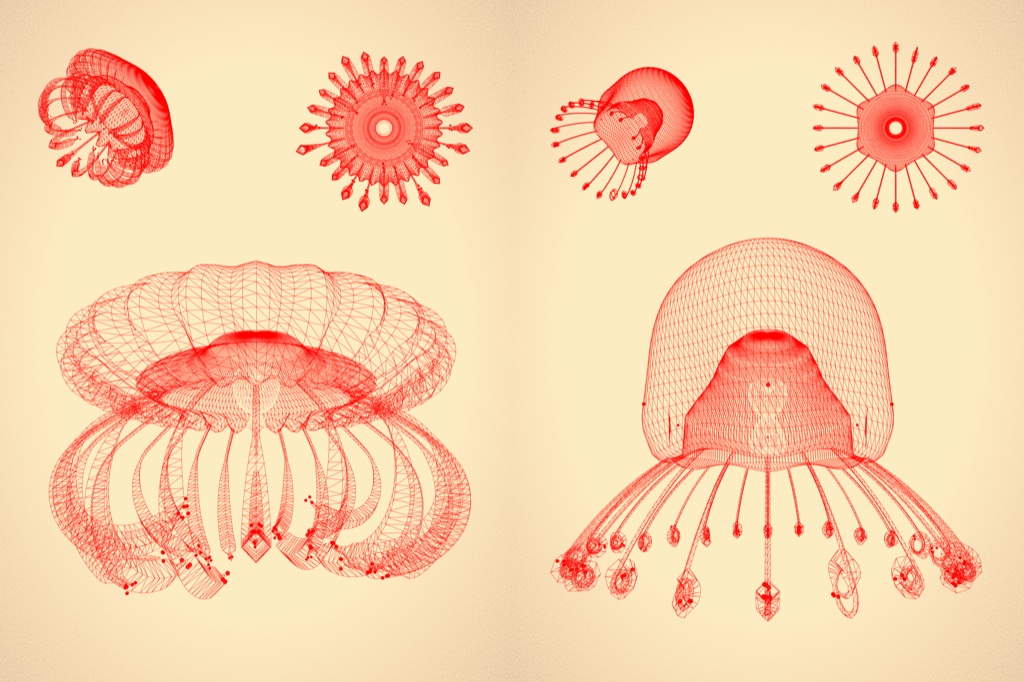
Final geometry
The geometry I used for renders is much higher density mostly to have nice smooth curves and avoid antialiasing artifacts.
Procedural shading
When I started I was aiming for very natural look so I was experimenting with Subsurface Scattering and even managed to get some decentlookingresults. I changed my mind after stumbling upon works by Ernst Haeckel and his amazing book "Kunstformen der Natur" - I knew that this is the way to go.
First step is to use standard diffuse lighting just to see if my mesh is smooth enough and I don't have any strange behaving normals.
Hatching
There are manyresearchpapers on how to achieve sketchy look in realtime. I based my implementation on code from
OpenGL Shading Language Book. The algorithm first generate vertical stripes along texture coordinates and then chooses the stripe density based on diffuse lighting. The less light the more dense the black stripes are. One important aspect was to choose the right width of the stripes so to output is visually interesting but we don't get too much Moiré effect. Big offscreen FBO (4080 × 2720 px) and antialiasing helps a lot.
Hatching with different density. Click the image to see hi-res version.
Unfortunately There will be no ProcessingJS examples in this part because some features depends on WebGL GLSL extensions like GL_OES_standard_derivatives and dFdx / dFdy functions that are not supported by any WebGL implementation I know yet. Copy pasting source code also doesn't make sense so please refer to the book if interested.
Colors
Every image is composited out of 5 layers:
- yellow background color
- orange page corders dirt
- black sketchy hatch
- blue highlights
- and pink borders
Both orange page corners and blue highlights are masked by noise so they look like drawn using crayons.
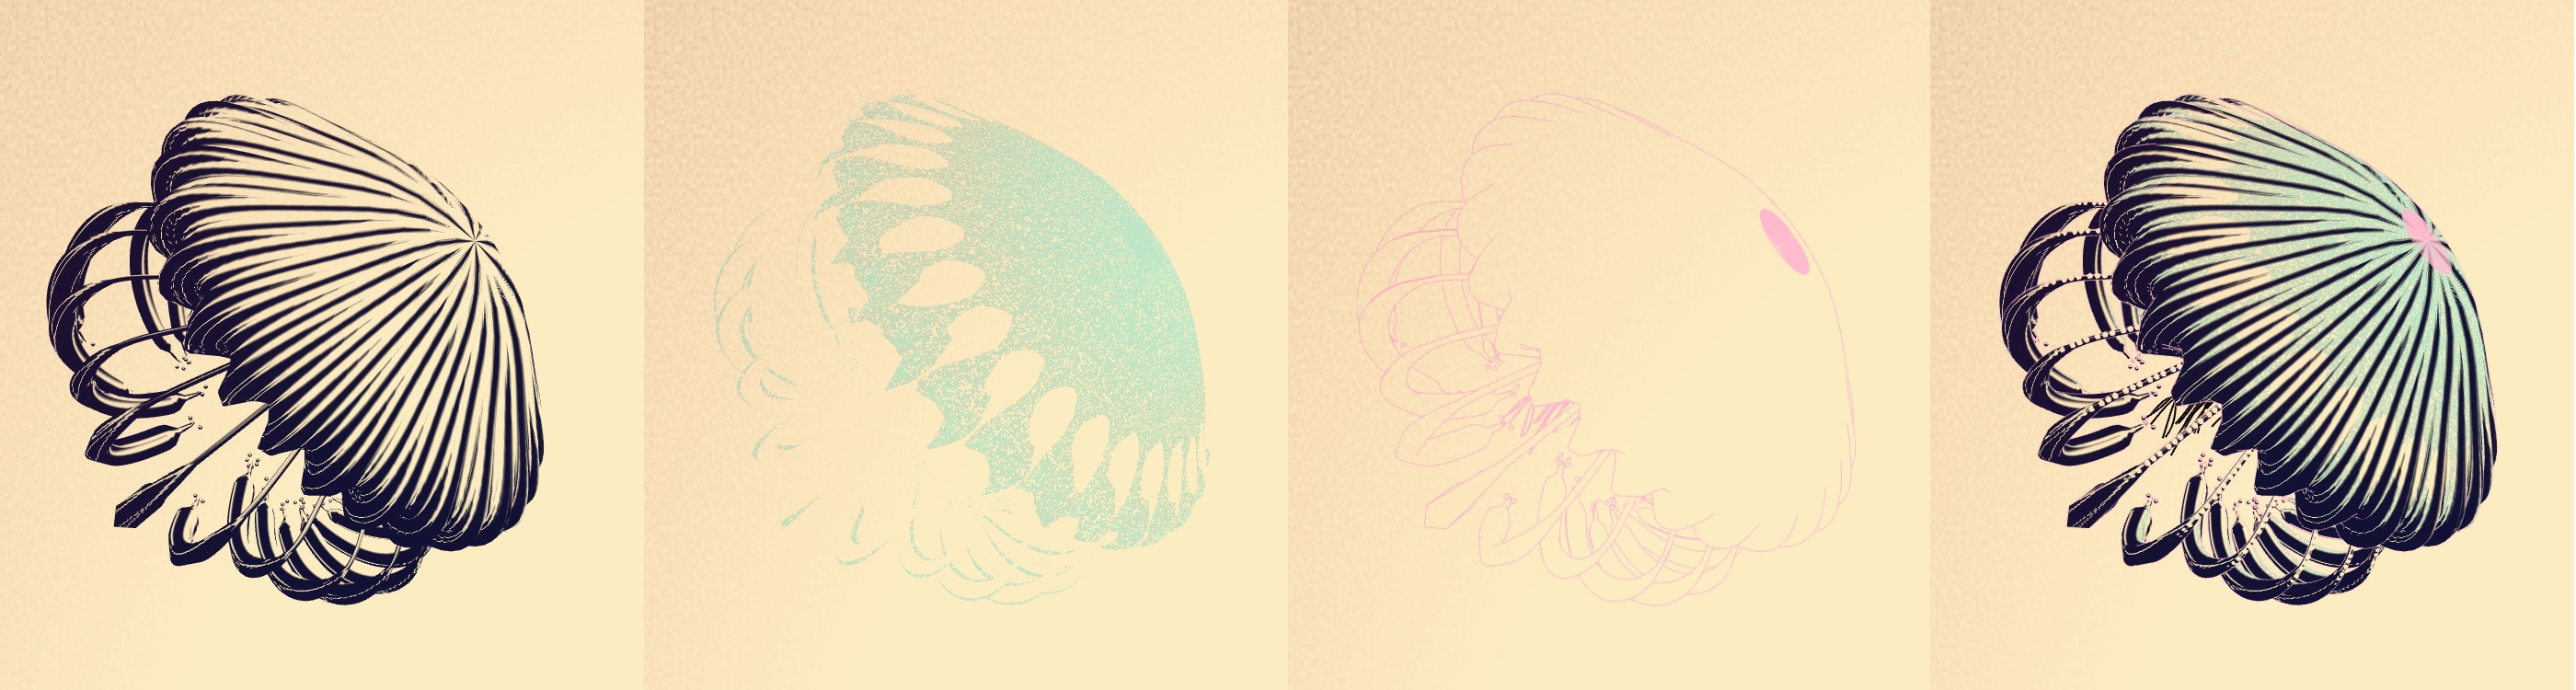
Color layers in final renders. Click the image to see hi-res version.
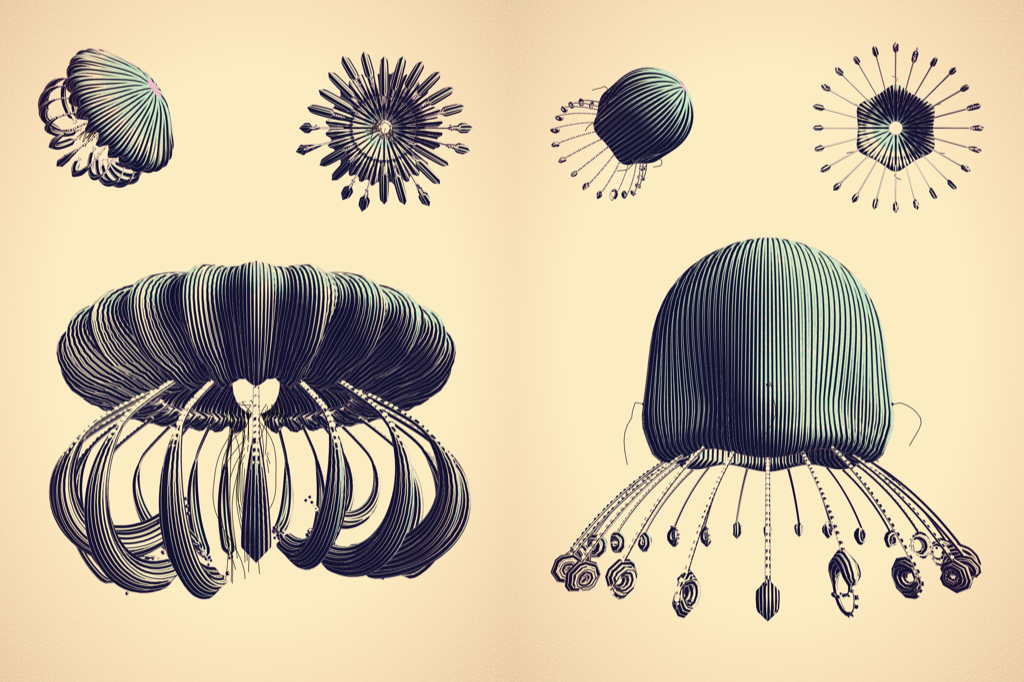
Final result with all steps combined.
Parametrization
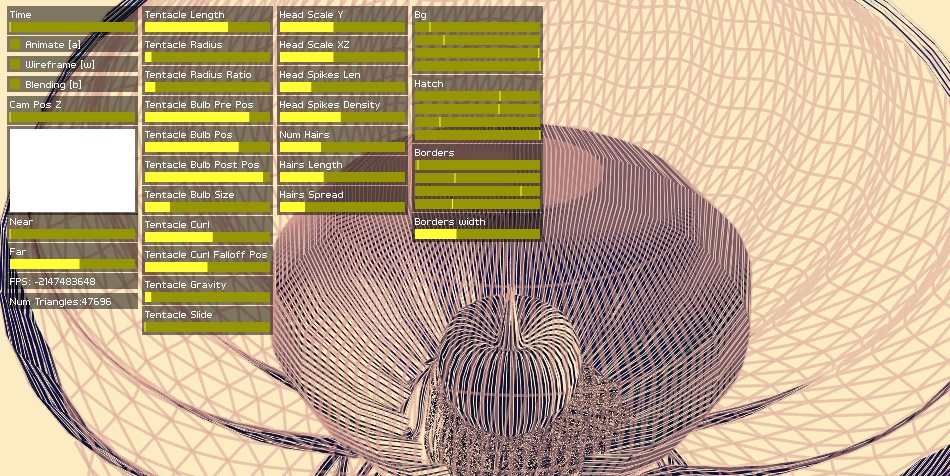
Very important thing to mention is that all the parameters are exposed through simple GUI system I developed. This allows my to play with them and see how shape of the creature changes and what should be minimal and maximum values that makes sense. Having that I can simply choose a random value for each variable and be sure every jellyfish will look ok.
What's next?
I want to work more on this project. First obvious step would be to optimize it so it runs on a decent framerate when animated. Right now it's around 10fps. I was thinkning about making WebGL port so people can create their own creatures online. The plan is also to extend the system and play with different organism types or plants.
- tags
- generative, procedural
- technologies
- cinder, opengl, glsl, webgl, processingjs